What is a screencast used for?

A screencast is a digital video recording that captures actions taking place on a computer display. Screencasts, which often contain voice-over narration, are useful for demonstrating how to use specific operating systems, software applications or website features or for e-Learning modules
How to make a screencast in 5 easy steps
Choose your screen recording software.
To get started, decide what software you're going to use to record your screen. ...
What i s Screeccasting? Video Presentation
Everything You Need to Make Educational Videos...More or Less
Myers, Simuelle. "6 tips for creating engaging video lectures that students will actually watch." Center for the Advancement of Teaching, Temple Univeristy.
Here’s what to consider when looking for screencast software:
Easy to use – You probably don’t want to and don’t have the time to fiddle around with complex applications. Screencasting should be easy and worry-free.
Free – This isn’t a ‘must-have’, but, in reality, you don’t have to invest much (or anything) to produce a screencast. Typically, a free screen recorder will do a great job as we’ll see in a moment.
Easy Sharing – Screencasting software can become a pain to use when you decide to publish your video tutorials. You should be able to share your recorded videos with just a few clicks in a matter of seconds.
Security – Most people who are screencasting are typically recording information that they may deem sensitive, e.g. university lectures, internal training videos. Security is a must.
![]() It is an ultra simple screen recorder that will supercharge the way you communicate at work. Record, edit and share HD videos in seconds.
It is an ultra simple screen recorder that will supercharge the way you communicate at work. Record, edit and share HD videos in seconds.
Free version: Record up to 5 minutes per video, with all recording features included
![]() Ezvid is a 100% free video creation tool that allows you to capture everything that appears on your computer screen. It also allows you to edit your recorded videos by splitting your recordings, inserting text and audio, controlling the speed and even drawing directly on your screen
Ezvid is a 100% free video creation tool that allows you to capture everything that appears on your computer screen. It also allows you to edit your recorded videos by splitting your recordings, inserting text and audio, controlling the speed and even drawing directly on your screen
![]() ScreenRec is reliable and super-easy screencast software (free for Windows + upcoming versions for Mac and Linux). Offering the simplest way to download and begin recording, this program ensures there is no learning curve to climb or tutorial to watch. Just download ScreenRec and you can get right to creating a screencast.
ScreenRec is reliable and super-easy screencast software (free for Windows + upcoming versions for Mac and Linux). Offering the simplest way to download and begin recording, this program ensures there is no learning curve to climb or tutorial to watch. Just download ScreenRec and you can get right to creating a screencast.
ScreenRec can record your screen and audio simultaneously and, even better, it automatically uploads your screencasts online, to your private cloud account. This means that you can share your tutorials and e-learning videos safely and privately with your students or colleagues while protecting your copyrights.
![]() One of the most popular open-source screencasting solutions, OBS Studio is not for the everyday software user. With powerful video screen capture capabilities, OBS ensures that your screencasts will be of the highest quality.
One of the most popular open-source screencasting solutions, OBS Studio is not for the everyday software user. With powerful video screen capture capabilities, OBS ensures that your screencasts will be of the highest quality.
However, you’ll need to climb a steep learning curve before you can venture in the vastness that is the Open Broadcaster Studio. Besides creating videos, with OBS studio, you can also broadcast live screencasts. There is also a powerful API that allows developers to create various plugins and scripts.
The idea of using a screencast software is to save time and avoid additional emails, phone calls etc. That’s why the software you are going to use need to be simple and easy to use. ScreenRec is a perfect choice in this regard, because it’s optimized to work fast and it’s not bogged down by unnecessary features
But if you just need short video presentations no more than 5 min. then we propose to use Screencasting.
If you are looking for a Windows supported open-source screen recorder, OBS Studio might be a good choice. It has vast features, concerning video quality, audio modifications, colour correction etc. OBS may be complicated but it has a lot of important tools to make sure your video will really be outstanding and impressive
It is a matter of your personal preference, but you should concider that to create a screencast, you need a screen recording tool. Different screen recorders have specific features but there are some basic criteria to consider. For example, an easy interface is important, since one of the main reasons people record their screens is to save time explaining and to avoid misunderstanding. Another requirement that most users have is the ability to simultaneously record audio along with the screen recording, so the explanations can be clearer and the information they share can be easily understood. Once you’ve recorded your video, you have to share it. This is another basic, but crucial, feature of screen recording software—easy sharing, without the need to use other apps and tools. The best screencast tool is the one that saves you the most time.
Voice over your PowerPoint presentations

Record a slide show
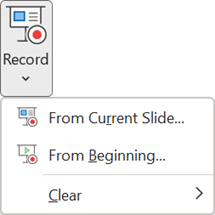
1. With your presentation open, on the Slide Show tab, click Record Slide Show.
Clicking the upper half of the button starts you on the current slide.
Clicking the lower half of the button gives you the option to start from the beginning or from the current slide.
2. In the Record Slide Show box, check or clear the boxes for your recording, and click Start Recording.

3. At the top left corner of the window is the Recording toolbar, which you can use to:
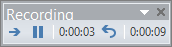
Go to the next slide
Pause the recording
Re-record the current slide
4. To end your recording, right-click the final slide, and click End Show.
Set the slide timings manually
PowerPoint automatically records your slide timings when you add narrations, or you can manually set the slide timings to accompany your narrations.
In Normal view, click the slide that you want to set the timing for.
On the Transitions tab, in the Timing group, under Advance Slide, select the After check box, and then enter the number of seconds indicating how long the slide should appear on the screen. Repeat the process for each slide that you want to set the timing for.
Tip: If you want the next slide to appear either when you click the mouse or automatically after the number of seconds that you enter—whichever comes first—select both the On Mouse Click and the After check boxes.
More information on how to record a slide show with narration and slide timings: